Facial Recognition Neural Network
GitHubModern devices unlock with your face in under a second. I wanted to rebuild a minimal version of that experience from scratch: collect a small dataset of faces, train a convolutional neural network, and use it to recognise whether the camera is currently seeing me ("nic") or someone else ("other").
The project is organised as a small, production-style pipeline: raw images go through a preprocessing stage, get converted into clean face crops, are fed into a CNN for training, then evaluated and finally wired into a real-time webcam script.
Pipeline Overview
1. Raw Images → Processed Faces (`preprocess.py`)
The dataset starts as folders of images grouped by identity, for example:
dataset/train/nic
dataset/train/other
Plus matching folders for test data.
preprocess.py walks these directories, runs OpenCV's haarcascade_frontalface_default.xml detector on each image, then:
- converts the frame to grayscale,
- crops a tight bounding box around each detected face,
- resizes to a fixed 96×96 resolution, and
- writes the crop into a mirrored
processed/train/<class>structure.
If no face is found, the script logs it so I can clean up low-quality or mislabeled images. By the end, every file in processed/ is a clean, normalized input for the CNN.
Example output:
$ python preprocess.py
Processing directory: ../dataset/train/nic
Successfully processed and saved: ../processed/train/nic/nic_3.jpeg
Successfully processed and saved: ../processed/train/nic/nic_2.jpeg
Successfully processed and saved: ../processed/train/nic/nic_1.jpeg
Processing directory: ../dataset/train/other
Successfully processed and saved: ../processed/train/other/sam5.jpg
Successfully processed and saved: ../processed/train/other/sam4.jpg
Successfully processed and saved: ../processed/train/other/sam3.jpg
Successfully processed and saved: ../processed/train/other/sam2.jpg
Successfully processed and saved: ../processed/train/other/sam1.jpg
2. CNN Model – `FaceRecognitionCNN` (`model.py`)
The core model is a compact convolutional neural network tailored for 96×96 grayscale faces. The architecture is:
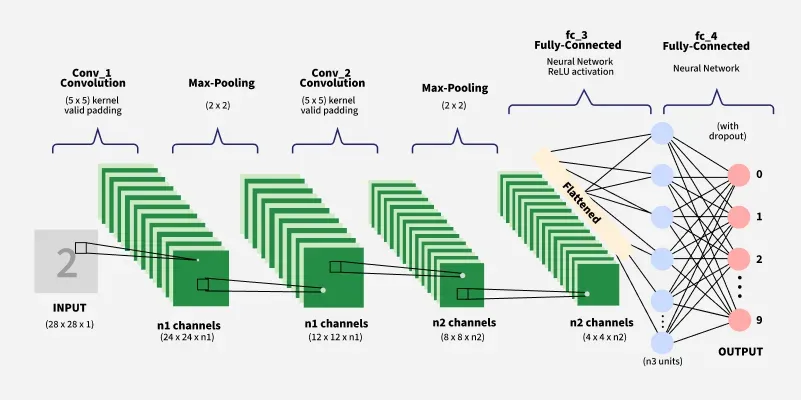
- Two convolutional blocks:
Conv → ReLU → MaxPool, growing from 1 channel to 32, then 64 feature maps. - A flattened feature vector of size
64 × 21 × 21fed into a small fully connected head. - A final linear layer outputting
num_classeslogits (here[nic, other]).
Mathematically, the network learns a function that maps an input tensor of shape 1 × 96 × 96 to a 2‑dimensional score vector, where the argmax gives the predicted identity.
Training & Evaluation
3. Training Loop (`train.py`)
Training uses torchvision.datasets.ImageFolder on ../processed/train, with transforms that:
- ensure images are grayscale,
- convert them to tensors, and
- normalize pixel values to a mean of 0.5 and std of 0.5.
Hyperparameters are intentionally simple: batch size 32, 10 epochs, Adam optimizer with a learning rate of 1e‑3, and cross‑entropy loss. After each epoch the script prints the loss and, when training finishes, saves weights to model.pt.
Example output from a training run:
$ python train.py
Epoch [1/10],  Loss: 0.6947
Epoch [2/10],  Loss: 1.0903
Epoch [3/10],  Loss: 0.2861
Epoch [4/10],  Loss: 0.2743
Epoch [5/10],  Loss: 0.0942
Epoch [6/10],  Loss: 0.0605
Epoch [7/10],  Loss: 0.0180
Epoch [8/10],  Loss: 0.0031
Epoch [9/10],  Loss: 0.0005
Epoch [10/10], Loss: 0.0001
Model saved as model.pt
Training completed successfully!
4. Measuring Accuracy (`evaluate.py`)
For evaluation, I mirror the training setup but load ../processed/test instead. The script restores FaceRecognitionCNN from model.pt, runs it on the test loader without gradient tracking, and reports:
Example output:
$ python evaluate.py
Accuracy on test dataset: 80.00%
This gives a clean, single metric for how well the system distinguishes Nic from everyone else on unseen data.
Using the Model
5. Single-Image Inference (`inference.py`)
To make the model easy to reuse, inference.py exposes a small predict(image_path) helper. It:
- loads the trained CNN with
num_classes = 2, - applies the same preprocessing transforms as training, and
- returns the human‑readable label from
["nic", "other"].
6. Real-Time Webcam Recognition (`webcam.py`)
The most satisfying part is the webcam demo. It uses OpenCV to grab frames from VideoCapture(0), runs the same Haar Cascade detector, feeds each detected face through the CNN, and overlays:
- a bounding box around the face, and
- a label saying either "nic" or "other".
Hit q to exit, and you've effectively turned your laptop into a tiny, on-device facial recognition system.
How to Run It Yourself
From the Python project root, you can reproduce the full pipeline:
python preprocess.py   # Preprocess faces
python train.py        # Train the model
python evaluate.py     # Evaluate accuracy
python webcam.py       # Webcam demo
Takeaways
Building this project made it clear how much impact careful preprocessing and consistent transforms have on model quality. Even a relatively small CNN can perform surprisingly well when every face is aligned, normalized, and seen through the same lens during training and inference. More than anything, wiring the model into a live webcam loop made the whole thing feel real — turning abstract tensors and loss curves into an interactive tool that either recognises me or confidently says "other".